Introduce
Welcome to the world of easy elegance with the twist me prettys knotted bun hairstyle. In this article, we’ll explore a simple yet stunning hairdo that’s perfect for any occasion. Whether you’re headed to work, a casual outing, or a special event, this versatile hairstyle is sure to turn heads. Follow along as we break down the steps and share expert tips to help you master the art of the knotted bun. Say goodbye to complicated hair routines and hello to effortless chic!
Introduction to the Easy Knotted Bun Hairstyle
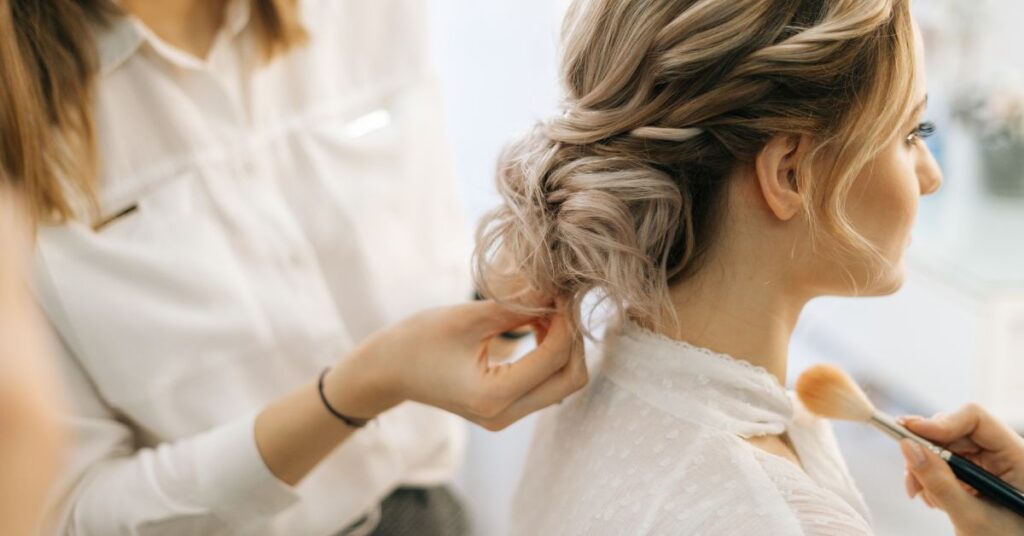
The knotted bun hairstyle is a timeless classic that exudes elegance and sophistication while being surprisingly simple to create. This versatile hairstyle can be adapted to suit various hair lengths, textures, and personal styles, making it a go-to option for many individuals.
Originating from traditional bun styles, the knotted bun adds a modern twist with its intricate yet effortless appearance. Unlike traditional buns that require extensive pinning and styling, the knotted bun relies on a series of twists and loops to achieve its unique shape.
One of the key benefits of the knotted bun is its versatility. Whether you have long, short, straight, or curly hair, you can easily adapt this hairstyle to suit your individual preferences. Additionally, the knotted bun works well for both casual and formal occasions, making it a versatile choice for any event.

Understanding the Basics of Hair Knotting
Before diving into creating the knotted bun hairstyle, it’s essential to familiarize yourself with the basics of hair knotting. While knotting may sound complicated, it’s actually a simple technique that involves twisting and looping sections of hair to create intricate patterns.read more
Here are the key concepts to understand when it comes to hair knotting:
- Twisting: Twisting is the foundational element of hair knotting. It involves twisting individual sections of hair around each other to create a tight, secure hold. Whether you’re working with small sections or larger ones, mastering the art of twisting is crucial for creating a polished knotted bun.
- Looping: Looping is another essential technique used in hair knotting. It involves creating loops or circles with sections of hair and securing them in place to form intricate patterns. Looping can be done in various directions and styles, allowing for endless creativity when designing your knotted bun hairstyle.
- Securing: Securing is the final step in hair knotting, ensuring that your hairstyle stays in place throughout the day. This can be achieved using a variety of methods, including bobby pins, hair ties, or hair clips. Depending on the desired look and the texture of your hair, you may need to experiment with different securing techniques to find what works best for you.
- Texture and Length: Understanding how texture and length impact hair knotting is essential for achieving the desired results. While some hairstyles may require longer hair for added volume and depth, others can be achieved with shorter lengths or textured hair. Experimenting with different textures and lengths will allow you to discover new and innovative ways to create stunning knotted bun hairstyles.
Preparing Your Hair for the Knotted Bun
Before diving into creating the knotted bun hairstyle, it’s essential to properly prepare your hair to ensure a flawless result. Proper preparation not only enhances the appearance of the hairstyle but also ensures that it holds up well throughout the day. Here are some steps to follow when preparing your hair for the knotted bun:
- Cleanse and Condition: Start by washing your hair with a gentle shampoo and conditioner suitable for your hair type. This helps remove any dirt, oil, or product buildup that may weigh down your hair and affect the outcome of the hairstyle. Be sure to rinse thoroughly to ensure no residue is left behind.
- Detangle: Use a wide-tooth comb or a detangling brush to gently remove any knots or tangles from your hair. Starting from the ends and working your way up to the roots, gently comb through your hair to ensure it’s smooth and knot-free. This step is crucial for achieving a neat and polished look for your knotted bun.
- Apply Styling Products: Depending on your hair type and texture, you may want to apply styling products to enhance the manageability and hold of your hair. For example, if you have fine or slippery hair, you may benefit from using a lightweight mousse or texturizing spray to add grip and volume. Conversely, if you have thick or coarse hair, you may prefer a smoothing serum or anti-frizz cream to tame flyaways and add shine.
- Consider Hair Texture: Take into account the natural texture of your hair when preparing for the knotted bun hairstyle. For example, if you have curly or wavy hair, you may choose to embrace your natural texture and incorporate it into the hairstyle for added dimension and flair. Alternatively, if you prefer a sleek and polished look, you can use a flat iron or blow dryer to straighten your hair before styling.
- Gather Necessary Tools: Before starting the styling process, gather all the necessary tools and accessories you’ll need, such as bobby pins, hair ties, and styling clips. Having everything within reach will make the styling process smoother and more efficient.
Step-by-Step Guide to Creating the Knotted Bun
Creating a knotted bun hairstyle may seem intricate, but with the right guidance, it can be achieved with ease. Follow these step-by-step instructions to master the art of the knotted bun:
- Start with a Ponytail: Gather all your hair at the crown of your head and secure it with a hair tie to create a ponytail. The height of the ponytail will determine the placement of your knotted bun, so adjust it according to your preference.
- Divide the Ponytail: Divide the ponytail into two equal sections.
- Create the First Knot: Take one section of the ponytail and twist it around itself to form a tight coil or knot. Secure the knot in place with bobby pins or hair clips.
- Repeat with the Second Section: Repeat the same twisting and coiling process with the second section of the ponytail, wrapping it around the first knot. Secure the second knot in place with bobby pins, ensuring that it sits snugly against the first knot.
- Tuck and Secure: Tuck any loose ends of hair underneath the knots and secure them with bobby pins to create a seamless look. You may need to use multiple pins to ensure that all the hair is neatly tucked away.
- Adjust and Fluff: Once the knots are secured, gently tug on the edges of the knots to loosen them slightly and create a fuller, more voluminous bun. Use your fingers to fluff and shape the bun until you achieve the desired look.
- Final Touches: Once you’re happy with the shape and placement of the knotted bun, give it a final spritz of hairspray to lock it in place and tame any flyaways. You can also add accessories such as hair clips, flowers, or ribbons to embellish the bun and add a touch of glamour.
- Optional Finishing: If you prefer a softer, more romantic look, you can leave a few strands of hair loose around your face to frame it beautifully. Alternatively, for a sleek and polished finish, use a smoothing serum or hair gel to smooth down any frizz or stray hairs.
Variations and Customizations for Different Hair Types
The beauty of the knotted bun hairstyle lies in its versatility, allowing for endless variations and customizations to suit different hair types, lengths, and textures. Here are some ideas for adapting the knotted bun to your specific hair type:
- For Long Hair:
- Experiment with multiple knots: Instead of creating just one knot, try incorporating multiple knots throughout the length of your hair for added dimension and visual interest.
- Add braids: Integrate braids into your knotted bun hairstyle for a bohemian-inspired look. You can braid sections of your hair before twisting them into knots or incorporate small braids into the bun itself for a textured effect.
- For Short Hair:
- Opt for mini knots: If you have shorter hair, create smaller knots for a dainty and delicate appearance. You can cluster several mini knots together to form a larger bun or scatter them throughout your hair for a scattered bun effect.
- Embrace asymmetry: Play with asymmetrical styling by positioning the knotted bun to one side of your head for an edgy and modern look. Allow a few strands of hair to frame your face for added softness and femininity.
- For Thin Hair:
- Create volume with teasing: If you have thin or fine hair, tease the roots of your hair before creating the knotted bun to add volume and lift. This will help prevent the bun from looking flat and lifeless.
- Use a sock bun: For an easy way to add volume to thin hair, consider using a sock bun or donut bun maker to create the knotted bun. Simply wrap your hair around the bun maker and secure it in place for a full and voluminous bun.
- For Thick Hair:
- Opt for a messy bun: Embrace the natural thickness of your hair by creating a messy knotted bun hairstyle. Allow some strands of hair to fall loose around the bun for a relaxed and effortless look.
- Incorporate twists and braids: To keep thick hair manageable and prevent it from overwhelming the bun, incorporate twists or braids into the hairstyle. This will help distribute the hair more evenly and add texture to the bun.
- For Curly Hair:
- Enhance natural curls: Embrace the natural texture of your curls by allowing them to cascade down from the knotted bun. Secure the bun loosely to preserve the shape of your curls and prevent them from being flattened.
- Add embellishments: Decorate your knotted bun hairstyle with accessories such as floral clips, ribbon bows, or decorative hairpins to enhance the overall look and add a touch of whimsy.

Conclusion
In conclusion, the knotted bun hairstyle offers a perfect blend of simplicity and sophistication, making it a versatile choice for any occasion. By mastering the techniques of hair knotting and following the step-by-step guide provided in this article, you can create a stunning knotted bun hairstyle that complements your unique hair type, length, and texture. Whether you opt for a classic knotted bun or experiment with variations and customizations, the possibilities are endless. Embrace your creativity, express your individual style, and elevate your hairstyling game with the timeless elegance of the knotted bun. Say goodbye to complicated hair routines and hello to effortless chic! read more
FAQs (Frequently Asked Questions) about Knotted Bun Hairstyles:
- Is the knotted bun hairstyle suitable for all hair types?
- Yes, the knotted bun hairstyle can be adapted to suit various hair types, including long, short, thin, thick, curly, and straight hair. By customizing the technique and incorporating different styling methods, you can create a knotted bun that complements your specific hair type.
- How long does it take to create a knotted bun hairstyle?
- The time it takes to create a knotted bun hairstyle depends on factors such as hair length, thickness, and personal styling preferences. On average, it may take anywhere from 5 to 15 minutes to complete the hairstyle from start to finish.
- Will the knotted bun hairstyle hold up throughout the day?
- With proper preparation and securing techniques, the knotted bun hairstyle can hold up well throughout the day. Using bobby pins, hair ties, or hair clips to secure the knots in place will help ensure that the hairstyle remains intact and looks polished.
- Can I add embellishments to the knotted bun hairstyle?
- Yes, you can personalize the knotted bun hairstyle by adding embellishments such as floral clips, ribbon bows, or decorative hairpins. These accessories can enhance the overall look of the bun and add a touch of glamour to your hairstyle.
- How often should I wash my hair before styling it into a knotted bun?
- It’s recommended to wash your hair regularly using a gentle shampoo and conditioner to keep it clean and healthy. However, you can also create a knotted bun hairstyle on second or third-day hair by using dry shampoo to refresh and add texture to your hair.
- Can I create a knotted bun hairstyle without using heat styling tools?
- Yes, you can create a knotted bun hairstyle without using heat styling tools by embracing your hair’s natural texture and employing techniques such as twisting, looping, and securing. However, if you prefer a sleeker look, you can use a flat iron or blow dryer to straighten your hair before styling.
- Are there any variations of the knotted bun hairstyle that I can try?
- Yes, there are numerous variations of the knotted bun hairstyle that you can experiment with to suit your personal style and preferences. Some variations include incorporating braids, creating multiple knots, or positioning the bun asymmetrically for a modern twist.
- How can I make my knotted bun hairstyle last longer?
- To make your knotted bun hairstyle last longer, consider using hairstyling products such as hairspray or texturizing spray to set the hairstyle in place and prevent flyaways. Additionally, securing the knots with bobby pins and avoiding excessive touching or tugging will help maintain the hairstyle throughout the day.

